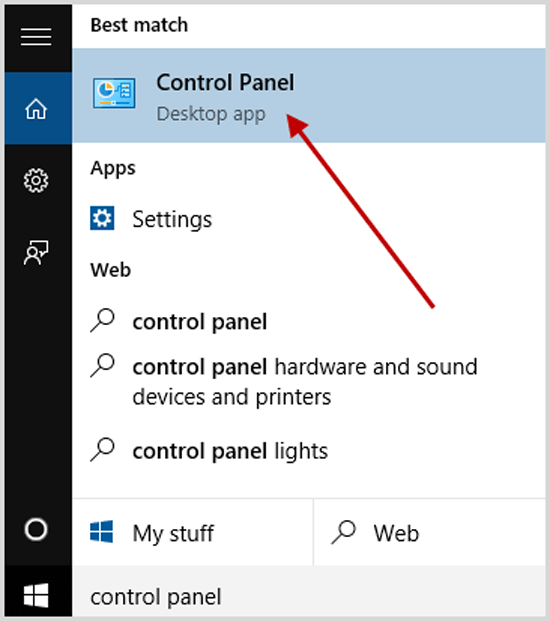
To create a static IP address on a Windows 10 or Windows 11 computer, follow these steps:
- Open the Start menu and search for "Control Panel".
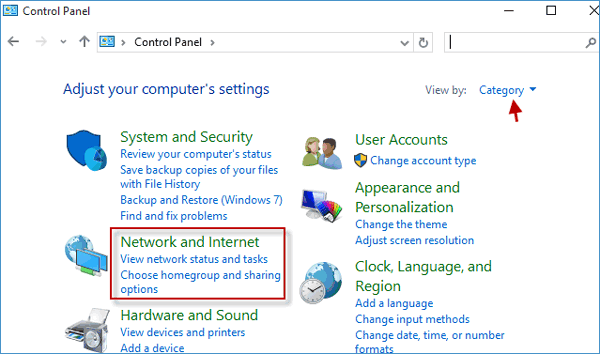
- Click on "Network and Sharing Center".
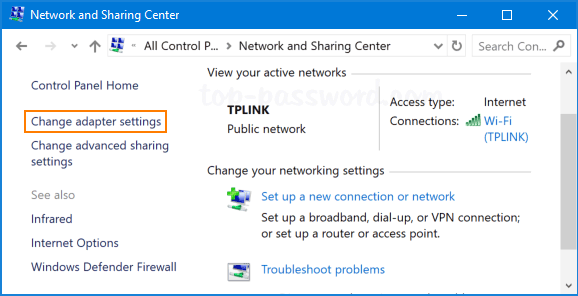
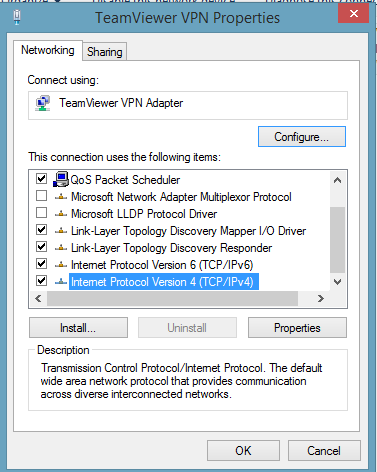
- Click on "Change adapter settings".
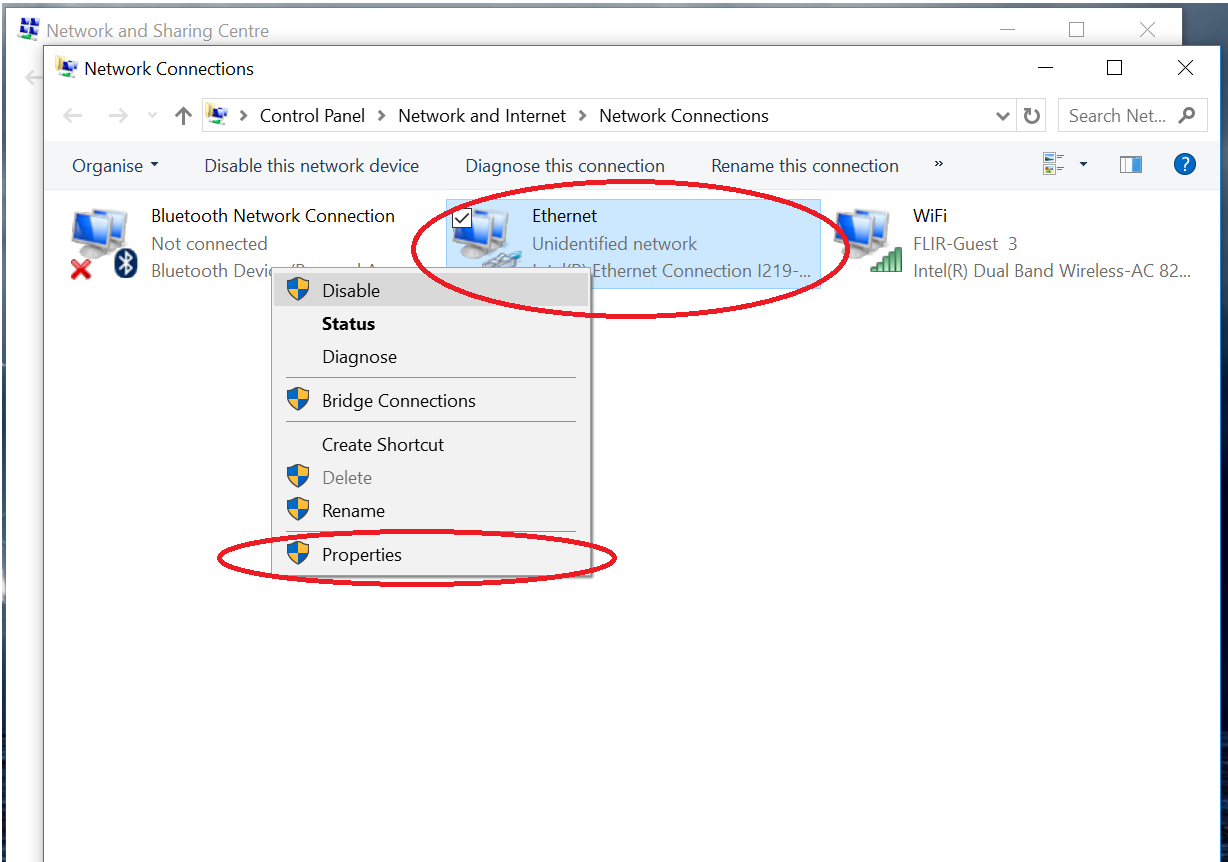
- Right-click on the network adapter that you want to configure and select "Properties".
- Click on "Internet Protocol Version 4 (TCP/IPv4)" and then click on "Properties".
- Select "Use the following IP address" and enter the desired IP address, subnet mask, and default gateway.
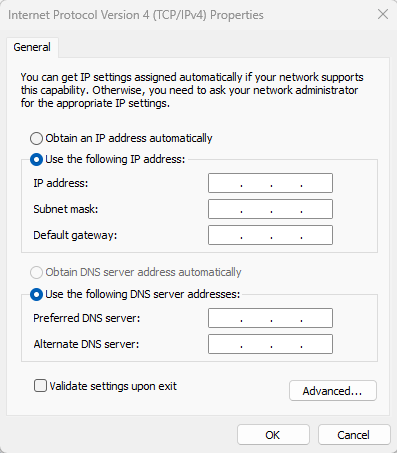
- Optionally, you can also enter a specific DNS server or use the default one provided by your router.
- Click on "OK" to save the changes.
- Restart your computer for the changes to take effect.
Please note that you should use IP addresses that are not already in use on your network, and that are appropriate for your network's configuration. Consult with your network administrator for proper IP address assignments.
